The never-ending project

This has been the most time consuming of all my projects. The possibilities are limitless.
Privacy is a growing concern, and it was time to curtail the access to my personal information. But I didn’t want to give up the control I have over my various devices.
Home Assistant is open-source software and runs locally on various platforms. I chose Raspberry Pi due to the compact size of the hardware.
Use the tabs below to see the various parts to this project.
Home Assistant
-
Hardware
-
Initial Setup
-
Adding Integrations and Devices
-
Voice Assistants
-
Scripts
-
Remote Access
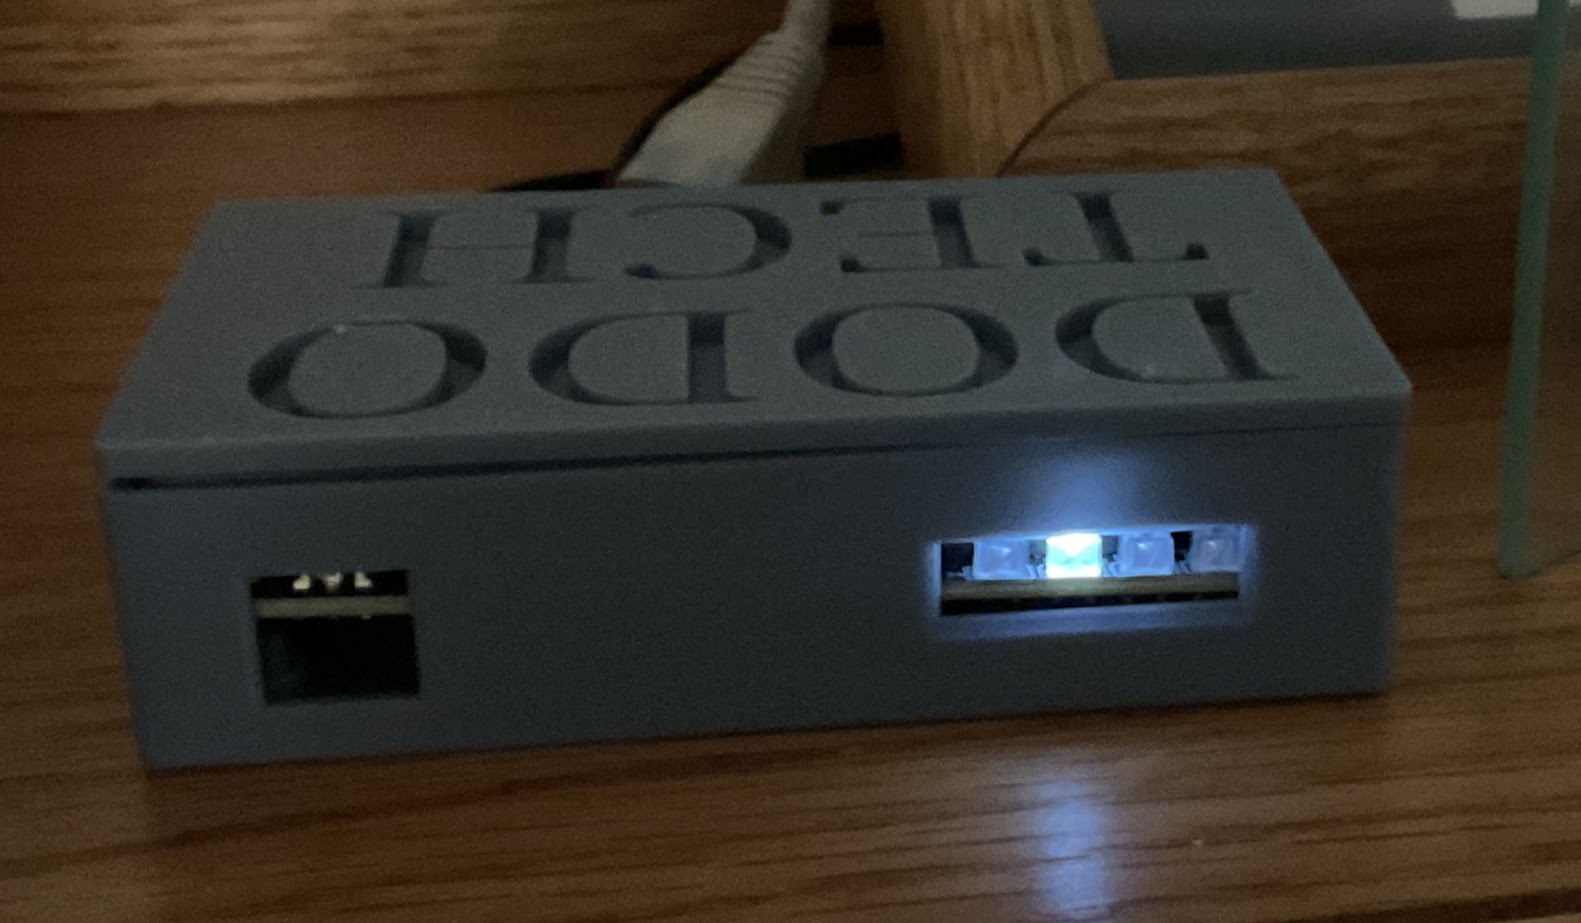
- Raspberry Pi
- ESP32 ATOM M5Stack
- 128 Gb SD card
- Home Assistant Software
These components were fairly easy to assemble. After assembly, I used software called Raspberry Pi Imager on my PC to create the boot system for the Pi with Home assistant.
I added a 1×1 inch M5stack Atom ESP 32 component to enable voice commands.
 M5Stack Atom for voice control

Pi imaging software


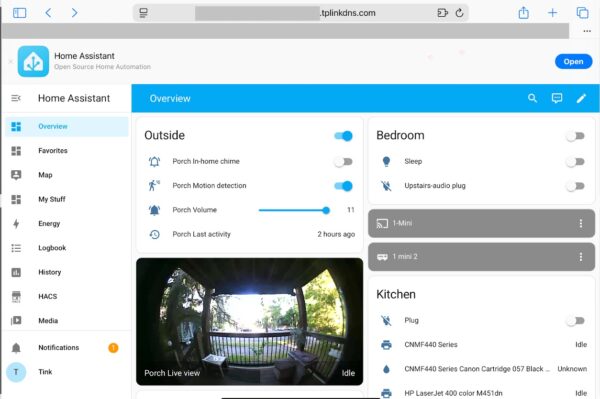
Home Assistant found a surprising number of devices all on its own, without my intervention. Once HA found the devices a simple click would add them into my system.
Under Settings > Devices & Services >Integrations I was able to add more of my IOT home devices.
Many of my lights and a couple of smart plugs were not found. I had to install the Tuya integration for some lights, VeSync for one smart plug, Matter for the others.
Once the integrations were installed most lights and plugs were detected on their own. If not, they were easily added manually under the Add Devices button in the lower left.
Within the Settings menu there is also an item called Add-ons. This section sent me down more fun little rabbit holes and I added some extra functionality, including weather forecasts.
Settings for the Voice Assistant are on the main settings page in HA. The standard integration for voice is the Wyoming Protocol. Wyoming needs to be added under Settings> Devices &Services “Integrations”.
Next, I added 3 parts from the Add-in Store to make the system function as a voice assistant. Piper- a local text-to-speech engine (TTS), Whisper -a speech-to-text engine (STT), and WakeWord to tell my ESP32 that I am speaking a command.
The “wake word” can be set to use one of 3 or 4 names. You can configure it to respond to any name you like with a couple of lines of code, but for now I am happy calling it Jarvis, one of the pre-programmed names.
The system controls devices by command correctly. At first, I got no acknowledgement that it heard me even though it had completed the task I gave it. After a few hours of research and experimentation, I now have an audio confirmation that the task has been completed. Jarvis responds, “Yes, m’lady”. I had to tell Jarvis how to pronounce it, though-muh-lady.
Scripts can be applied to a button on my dashboard or carried out by my voice assistant.
Scripts and automations created so far:
Script to change HDMI input on my TV
Automation to turn on bedroom light before bedtime
Script to turn on Audio by zones
Script to give audio confirmation on commands given to my ESP32 (Jarvis)
Under Construction– kitchen timer
Remote access was easier than I thought it would be. I finished the configuration in about 20 minutes this morning. The security may be a little trickier. That is next on my list.
I am using a full featured wireless router system. Through DDNS and port forwarding I can reach my HA from anywhere that has internet access. I will spare the details here. For those who are curious, I will provide a link to the process.