
Before and After


Flaws with existing box/system
Crowded, haphazard labeling, unstable when opened, inadequate wall mounting option, heavy
Requirements
- Closed lightweight Wooden container
- Must have hooks for 20+ keys
- Standardized label system
Materials | Tools |
|---|---|
Wooden Box with buckle latch – 15x11x2 12×12 medium wood 3 mm thick Cardboard for prototype Wood Glue Split rings Paint Labels Buttons Hooks Bolts and nuts Cardstock Belt Mounting hardware | Universal laser cutter Band saw Sander Drill Label maker Clamps Screwdriver Silhouette Cameo Inkscape Adobe Illustrator/print processor |
The Process
- Gather materials, decide on general design for insert, key tags, exterior design
- Laser cut interior design in a fashion that allows for key tags to be cut from negative space
- Paint insert
- Glue insert to inside box, secure with glue-clamped for 1.5 hours
- 💡 Idea while in process–Use existing wood buttons for “bling” also adds depth so that screws do not poke through the supporting box
- Add buttons and hooks
- Paint key tags-Key tag hole was too small for my split rings, so I had to drill larger holes
- label key tags and attach to keys
Done?
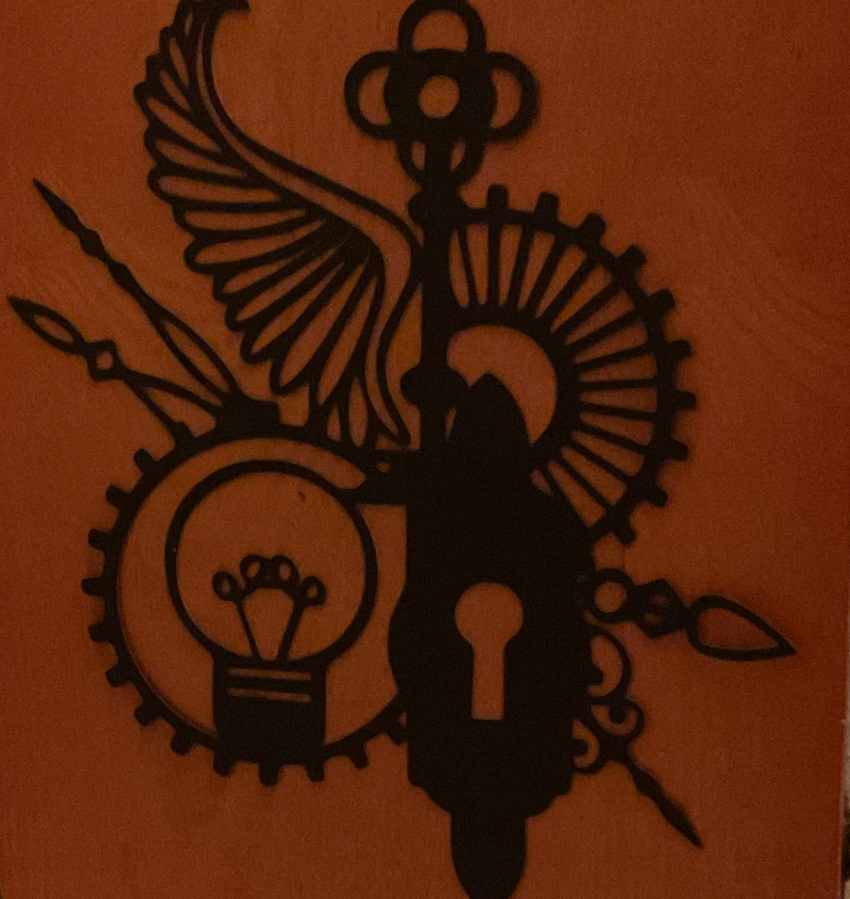
I didn’t expect to hate the plainness of the outside of the box, so now I had to decorate. My graphic skills are limited, so this took effort. I found an SVG file on Etsy that I liked and cut it out on the Silhouette. I found some stickers to enhance the corners of the box. I wasn’t happy. I created an AI graphic that I thought would fit the theme of the box. I didn’t love it. I dug around looking for an old belt to replace the existing ugly handle and drilled holes for the screws. I stumbled across an old dragon’s eye I’ve had around just waiting to be put to use. I finally felt it was finished!
What I would do differently:
When I cut the background/tags, I forgot to “size the piece of wood–It would not fit into the box. I realized this after I sent the first section into the laser. I was trained on the bandsaw and sander, but it was a while ago and I am inexperienced. Hayden said he would help me with the wood tools. This fulfilled one of my goals- to use the wood shop. Next time I would cut to fit when I created the original design.
Challenges:
There were two challenging things for me. One, the holes in the key tags were too small to accommodate my split rings. I used my drill at home to fix that. I hope that I would not make that mistake again. Number two was trying to design the outside of the box. I thought I would like it to be plain, but, after seeing it, I didn’t like it. I am not a good designer, so it took a lot of effort to create something I was satisfied with.


Leave a Reply